Using the ChaseData Admin Portal to Create a Campaign
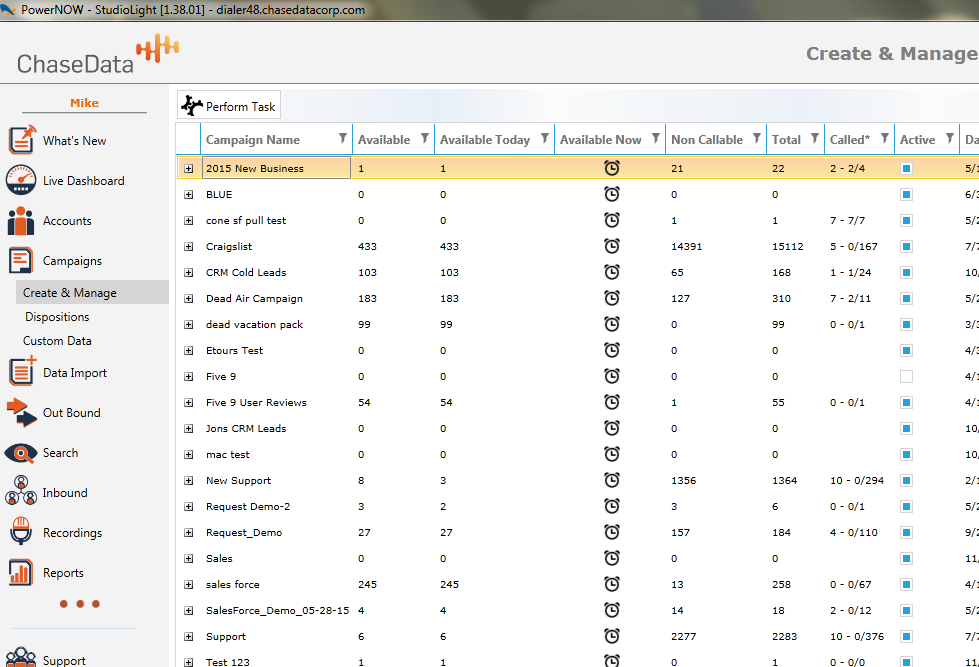
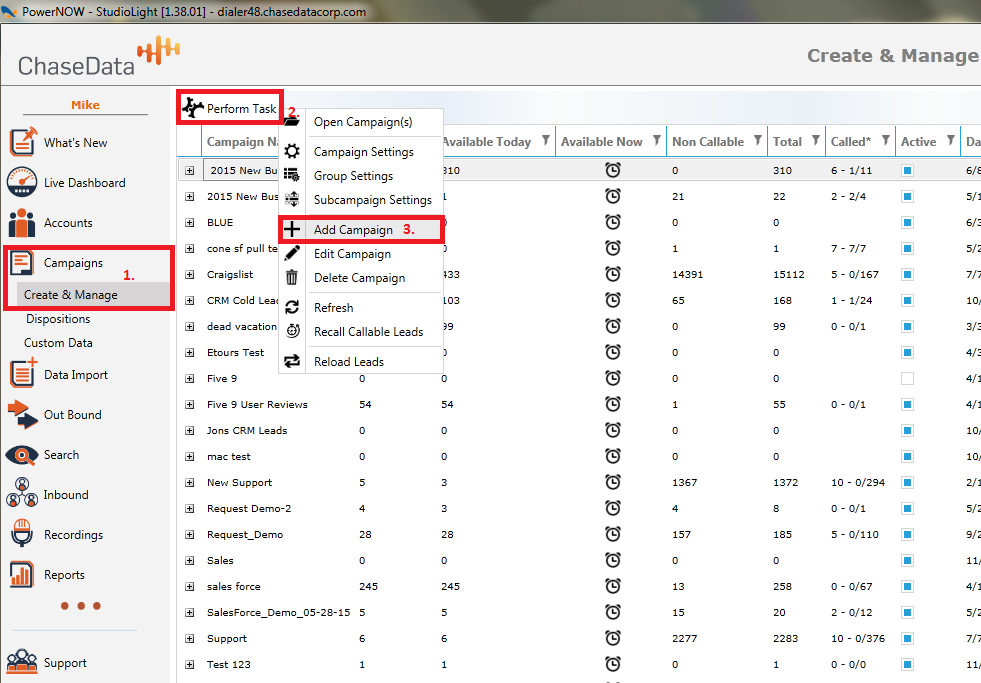
ChaseData Admin will always be accessed via your web browser (Google Chrome is recommended) at the URL provided to you in your setup instructions. After logging into ChaseData Admin you will be taken to the Dashboard where you will be able to monitor your agents and campaigns. To create a campaign, click on the purple “Campaigns” icon and then on the light blue “Campaign Mgr” icon. Then click on the green “Perform Task” button and the select “Add Campaign.”
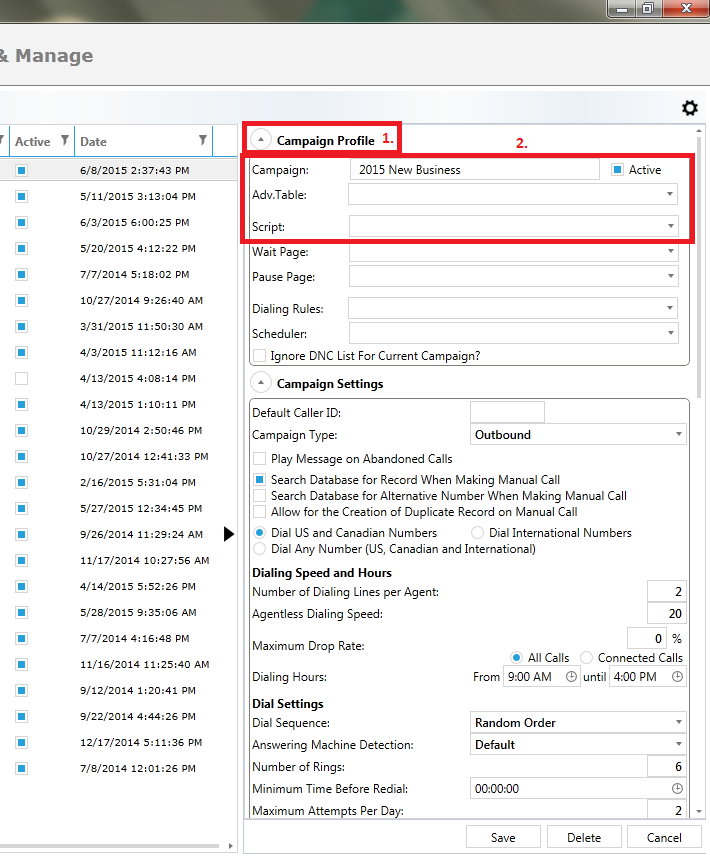
The “Campaign Profile” box will then open up. Enter the name of the campaign and then link an advanced table and script if you have them. Select “Save” in the lower right portion of the screen and your campaign (with no data yet) has been created. Dialing Rules and Scheduler are more advanced options that allow you to establish unique dialing rules and schedule specific activities. You may also choose to ignore the do not call list you have loaded in the campaign by checking the box in the lower left hand corner of the campaign profile box but this is not recommended.
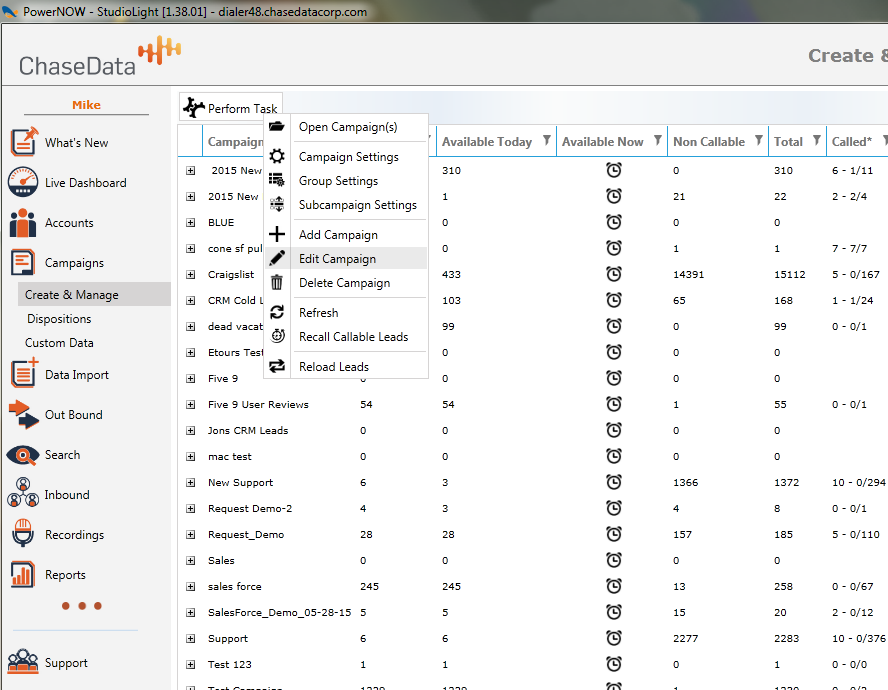
Once the campaign has been created, right click on it and select Group Settings and the Group Settings Box will open up. The options available will be discussed after introducing Campaign Settings, as the options very closely mirror each other.

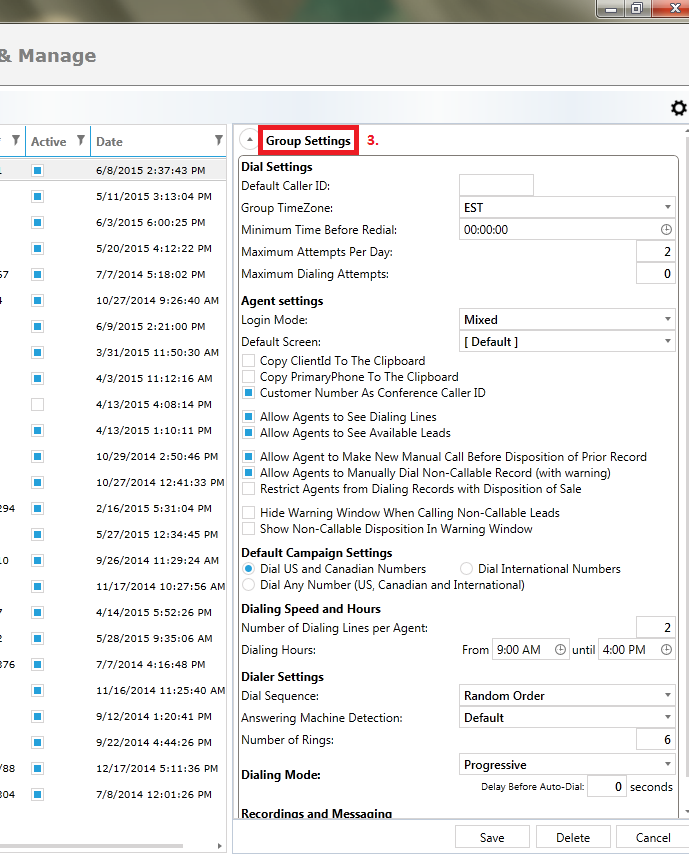
Once group settings have been established, they will become the default settings for each future campaign unless they are overwritten by campaign settings. These specific campaign settings may be accessed by double clicking on the campaign. The campaign settings will appear between the campaign profile and group settings as shown in the figure below.
Important Group and Campaign Settings
· Default Caller ID: If you want a specific number to appear on a prospect’s caller ID you must enter it into this field. If you leave this field blank, the ChaseData Dialer System will randomly select disconnected numbers to appear. Two other options exist which may be set up by the ChaseData technical support team. The first is to have the dialer select numbers with a specific area code (e.g. you are calling from New York and you want the customers to always see a 212 area code). The second is for the dialer to select numbers with an area code in the same region of the number being dialed (e.g. The first call is made to a 212 number so the caller ID selected has a 212 prefix, the second number is to a 954 area code so a 954 number is selected).
· Group Time Zone: Select the time zone for your location. This will assure your reports accurately reflect the correct time.
· Inbound DID: If you will be making inbound calls, the inbound DID provided by ChaseData must be placed in this box and the box immediately below it (i.e. “Do you want to accept inbound calls?”) must be checked. It is also a good idea to have the “Look up calling party on inbound?” box checked.
· Enabling an IVR for Dropped Calls allows a message to be played to a customer who might otherwise be dropped, allowing them to opt out if they should so desire.
· Dial US and Canada: Unless your contract provides for international dialing, you will want to have this radio button selected.
· Dialing Speed (lines per agent): This sets the number of lines that will be dialed per agent.
· Dialing Hours: These are the hours that the dialer will allow agents to connect with customers. The ChaseData dialer is intelligent enough to know what time zone it is calling into. If, for example, the dialing hours are set from 9 to 21, agents may start making calls at 9:00 AM but the dialer will only place calls to east coast numbers until 10:00 AM after which it will start dialing central time zone area codes (e.g. Illinois), etc.
· List Ordering: There are four options the dialer uses to select leads from a campaign:
- Random (recommended) – The dialer will randomly select leads with a bias for selecting leads which have been less frequently called.
- List Order – The dialer will call the oldest leads first and then move to the newest.
- Last Name – The dialer calls leads in the alphabetical order of the customers’ last names.
- List Order Desc - The dialer will call the newest leads first and then move to the oldest.
· Answer Detection:
- Default - 85% of answering machines are detected – this is the most recommended setting if you are calling residents.
- Quick - 50% answering machines are detected – this is the recommended setting if you are calling businesses but wish to avoid most answering machines.
- Full - 75% answering machine detection.
- Accurate - 90% answering machine detection (There may be a slight delay when a customer answers).
- None - No answering machine detection – this is the recommended setting if you are calling for small collection accounts or have a smaller targeted list.
· Number of rings: This is the number of rings the dialer will allow before considering the lead will not answer.
· Minimum Time to Recall: This is the soonest that a lead will be recalled. It is generally a good idea to set this up for 4:00 hrs and the maximum number of attempts per day as 2.
· Maximum dialing Attempts: This is the maximum number of times a lead can be called. If this is set to 0, the lead will continue to be dialed without a system set limitation.
· Dialing Mode:
- Available – The dialer will only dial when an agent is available to take a call.
- Power – The dialer will dial until all agents are connected – Not recommended.
- Predictive – The dialer will continuously dial the number of lines specified on the dialing speed box above it and connect calls to the agents.
- Progressive – The dialer will methodically go through the lead list assigning each successive lead to an agent. The agent’s screen will populate with the lead’s information and the agent will select when to dial it – best when the agent wishes to review customer information in advance or when calling cell phones.
· Scheduler Type: This allows a scheduling program such as Google Calendar to be linked to a campaign.
· CRM Integration: If you have elected to integrate a CRM to your dialer, such as Zoho, it can be linked to the group or campaign through this drop down window.
· Under Agent Settings it is generally a good idea to “Allow Agent to See Dialing Lines.” In this way an agent may watch the number of calls that are being made while he/she is waiting on a call.
There are several reasons why you may want to override the group settings for a specific campaign. Let’s say, for example that you would like to select progressive dialing for a campaign rather than predictive as was selected for the group. This is easily done by double clicking on the campaign and modifying the specific settings for the campaign. Please also note that the location of some of the above options will be slightly different between group settings and campaign settings.
Related Articles
Feature Update-Campaign Settings
Feature Update Campaign Settings & Default Settings The Campaign Settings scope has grown over time, and we have reached a point where we find the need to reorganize/regroup these settings, including some renaming, to make sure it stays intuitive and ...Setting up a Campaign
Setting up a campaign in ChaseData’s Cloud Contact Center Software is quite simple. The challenging part is knowing you own personal dialing strategy you want to pursue. Whether it be Outbound, Inbound or Blended dialing ChaseData’s campaigns have ...What is ChaseData Admin Application?
The ChaseData Admin Application is a tool call center owners, managers and supervisors can use to monitor, control and report on what is happening in their call center. The Admin application covers a tremendous amount within our cloud based contact ...Admin Update 1.40.75 Features & Changes
Create & Manage Changes: Perform Task Removal This version update introduces some changes to the Create & Manage module for campaigns. Previously users had a button labeled "Perform Task" which invoked a menu (users are also able to right click ...Setting Up Call Flows in ChaseData Admin Application
This article is going to cover the set of inbound Call Flows in the ChaseData Admin Application. The Call Flows are basically programmed actions on available dial options that the customer can choose on an Inbound call ( digits 0-9 ). Based on the ...