Setting up an Advanced Table with Custom Fields
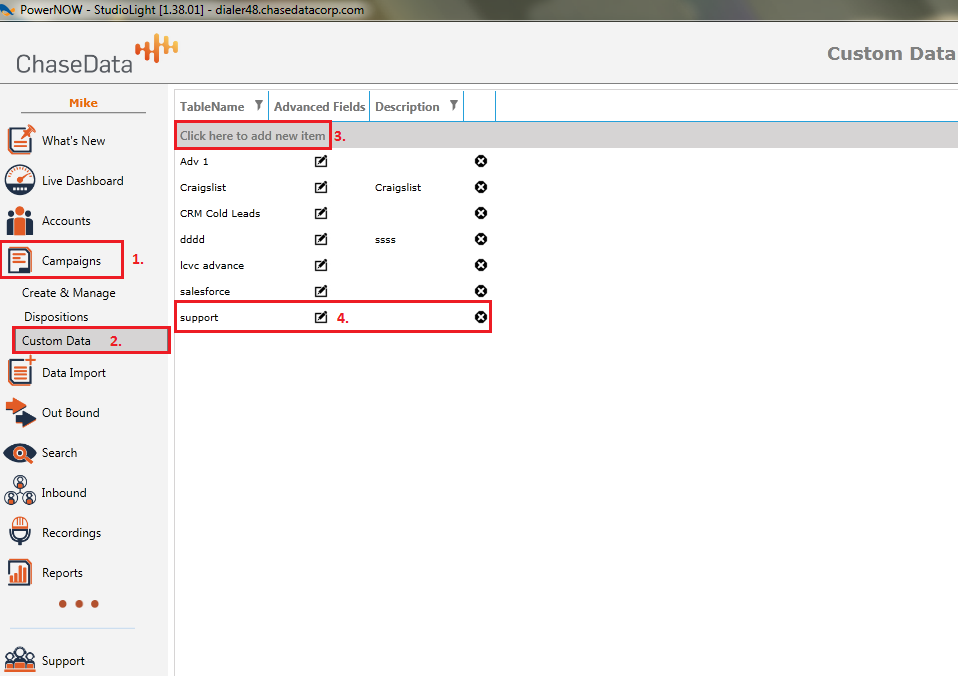
As mentioned previously, the ChaseData Dialer has certain standard default fields including first name, last name, phone number, address, city, state and zip code. Let’s suppose that we also wanted fields for company name, email address and second telephone number. These are easily added by using an advanced table. To create an advanced table, select “Campaigns” from the left spine (step 1), and then Advanced Table underneath it (step 2). Then, click on “Add new advanced table” (step 3), enter a name and description (step 4) and then hit enter to save it
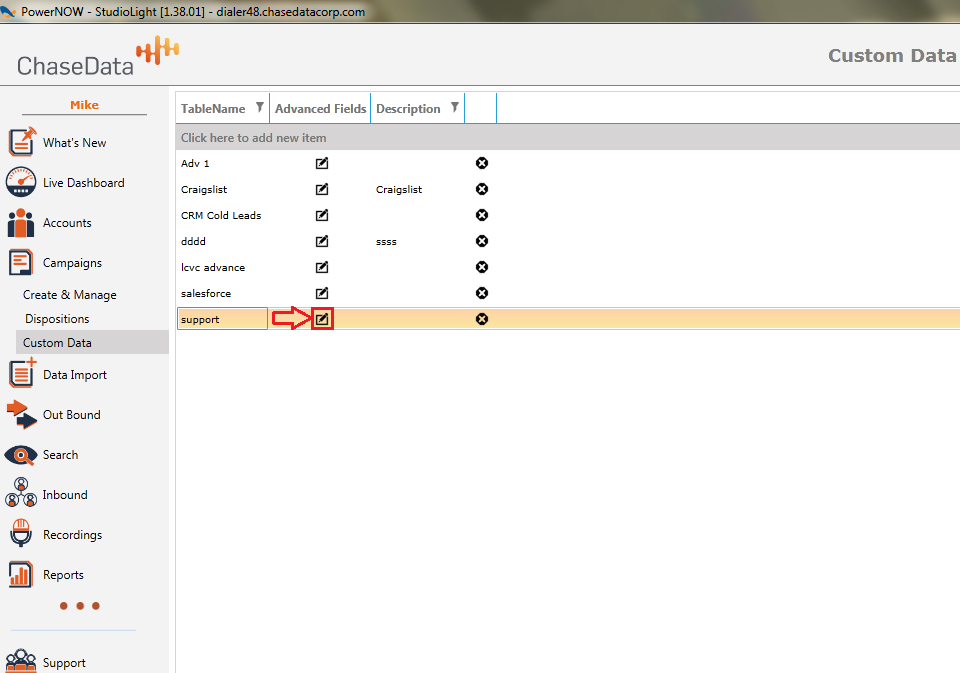
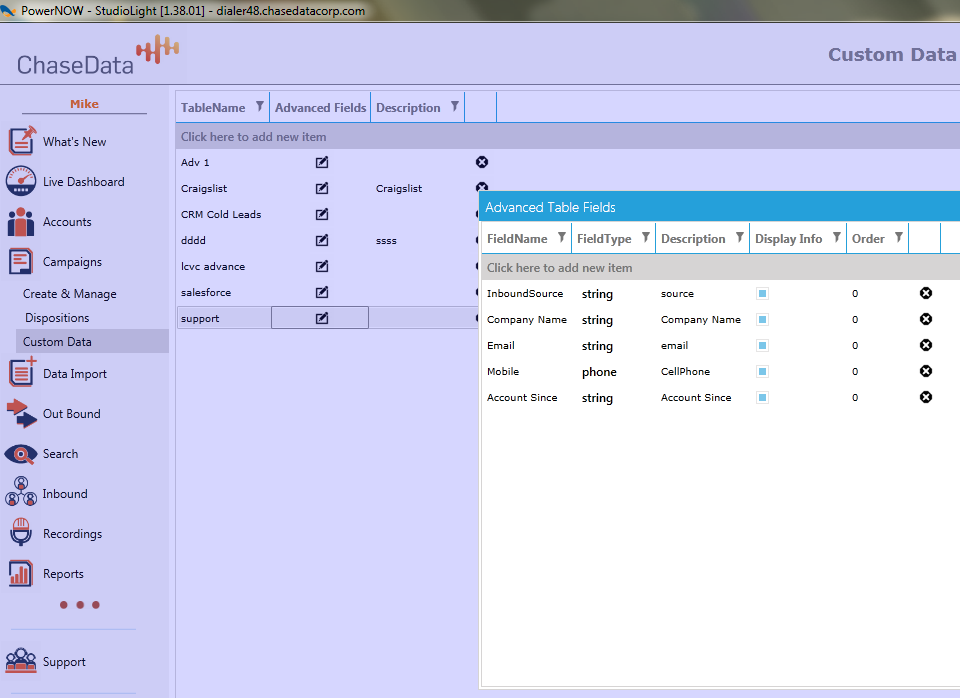
Your advanced table is now inserted. Next, click on the “Fields” icon to add fields to the campaign.
A new window will open up allowing the entry of additional fields you would like to add.
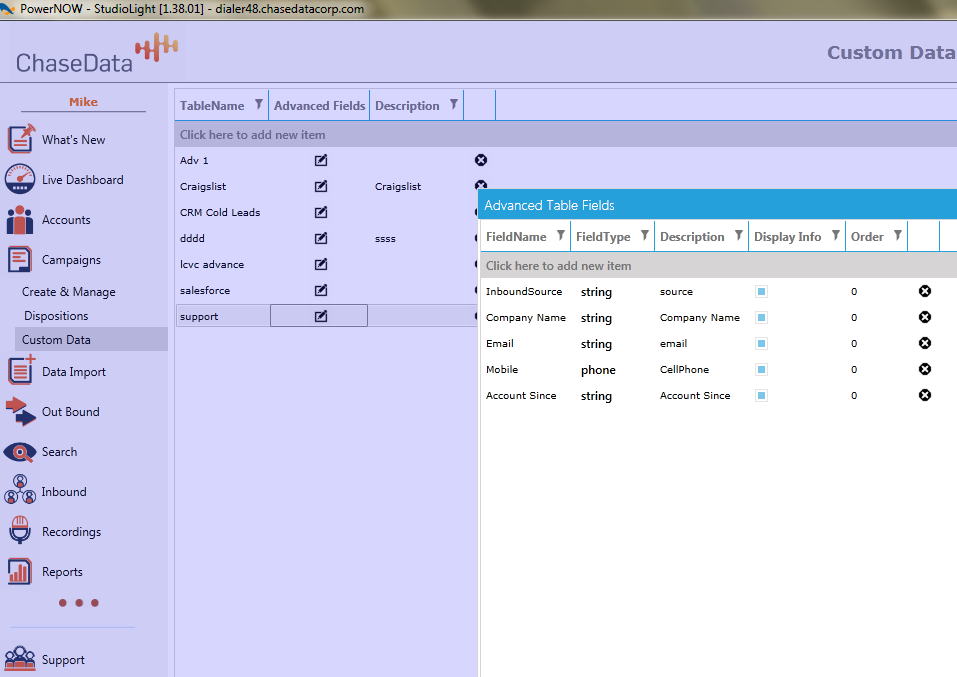
Generally, the fields will be entered as strings. One of the few exceptions would be a second phone number. In our case we wanted to enter company name, email address and a second telephone number. These are easily added by using an advanced table.
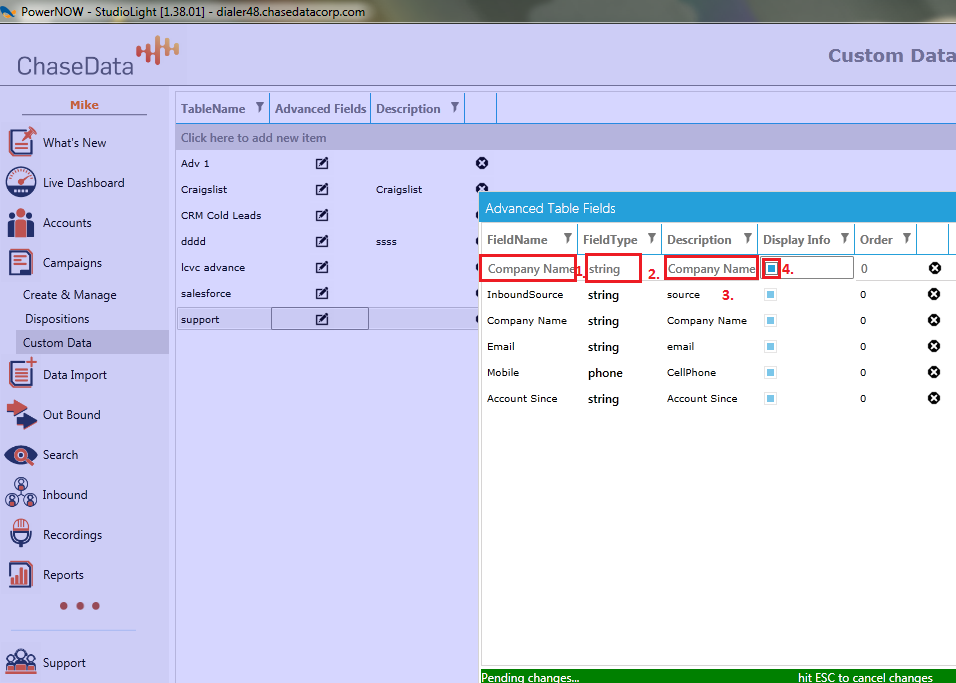
In the above example we entered our first field (step 1), we identified it as a string (step 2), we added a description (step 3), we choose to display the information to the agent by selecting the appropriate box (step 4), and then press enter to save it.
We continue the process by selecting “Add new field” until all the fields we want have been added as shown below.
Normally you will want to add an advanced table to a campaign before uploading data. This allows you to map data into the fields you want. In our case the first set of leads that we imported did not contain theses fields so we are fine. Let’s suppose we want to upload a new sub campaign that does have those fields, we may add the table to the campaign and map the data as appropriate. To add the table to the campaign, go back to the campaign manager, double click on the campaign (step 1), select the advanced table we created from the drop down menu (step 2) and then save (step 3).
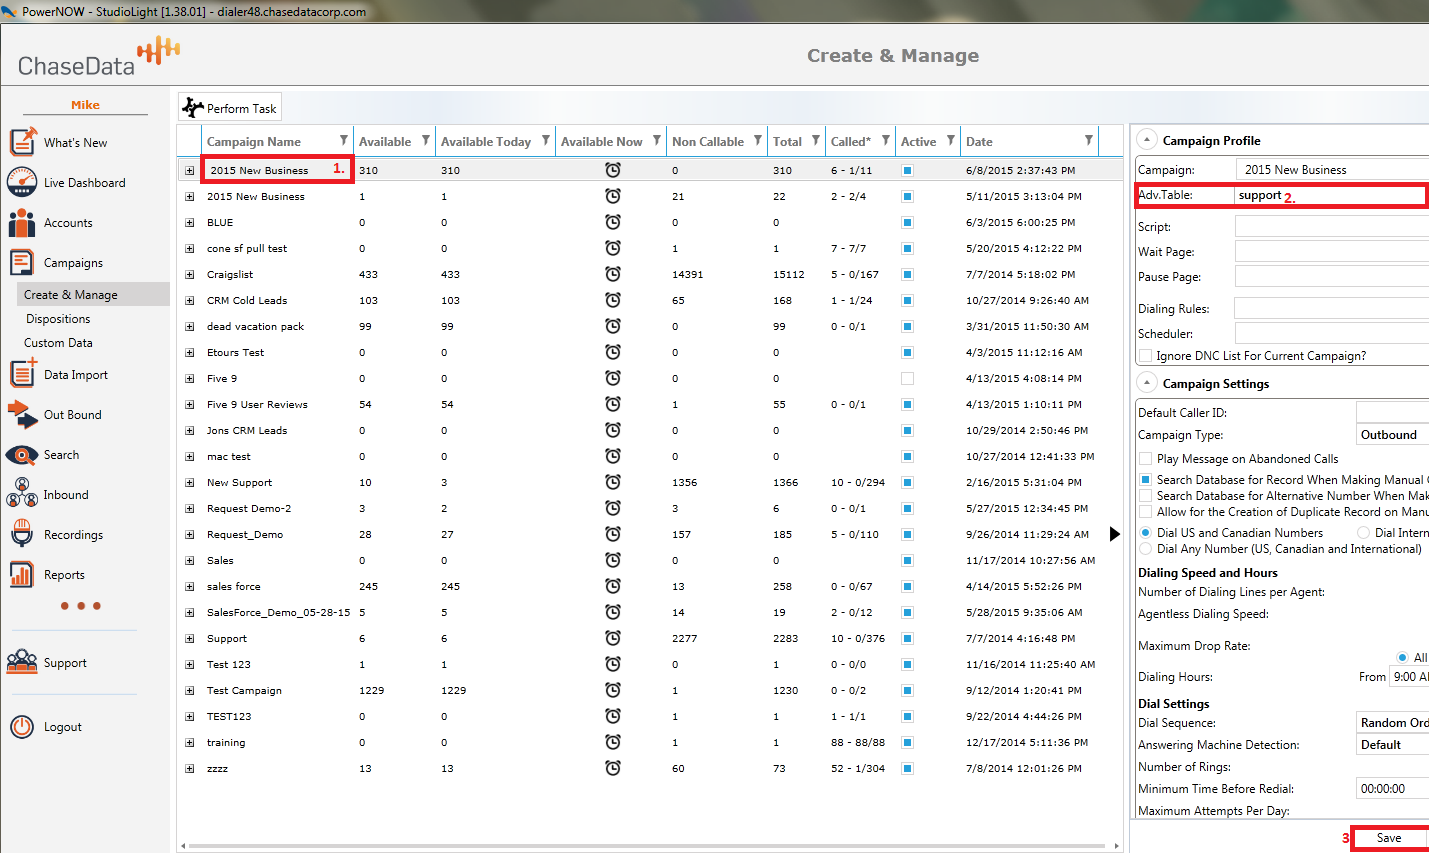
The next time you import data, the fields we entered will be available to be mapped.
Related Articles
Setting up Custom Tables
This article is going to covering creating and configuring a custom table for a dialing campaign in ChaseData’s Cloud Software Aministrator Portal. First we need to login to the Administrator portal and head over to the campaign module. From there ...Setting Up Agent Skills
This article is going to cover creating a new agent skill and configuring it to be used by agents in ChaseData’s Cloud Software Administrator Portal. The first place we need to go is the additional settings menu which is going to be at the top right ...Setting up Alternative Number Dialing Rules
This article is going to cover setup to dial alternative numbers on ChaseData Admin Application. The first place you have to go is the Out Bound dial menu in the Admin Application. Once here you can select the Dialing Rules menu option. There are two ...Setting up a Campaign
Setting up a campaign in ChaseData’s Cloud Contact Center Software is quite simple. The challenging part is knowing you own personal dialing strategy you want to pursue. Whether it be Outbound, Inbound or Blended dialing ChaseData’s campaigns have ...Importable Default Fields
These are fields that exist in the system by default. You do not have to create these again in custom data unless you would like to do that. The fields include: FirstName LastName ClientId PrimaryPhone Address City State ZipCode Notes