Entering Leads into a Campaign
A single campaign has been created with the dialing rules established but leads need to be imported into the campaign.
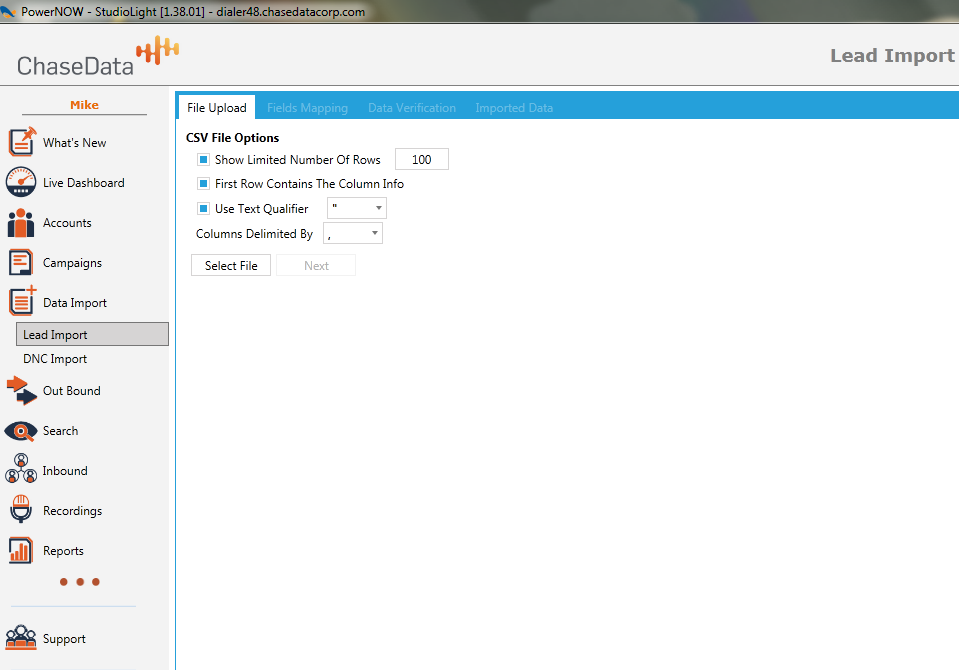
It is important that if the leads are in an Excel Format that the file be opened and saved to a CSV file. To upload a CSV file into your campaign, select “Import Data” in the left spine and then “CSV Import” directly beneath it. Select the file to be placed in the campaign and then upload it.
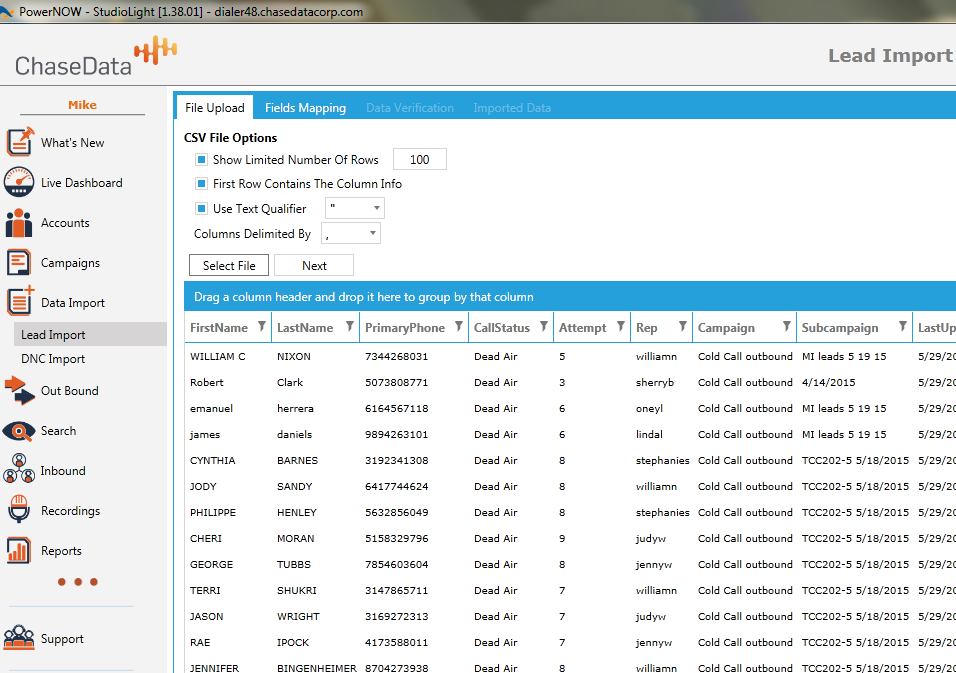
Once the campaign has been uploaded, press preview and then next.
You will then be led to a screen that will allow you to select the campaign into which the data is placed and map the fields of the imported data into the fields the representative will see on his or her campaign. The basic fields are first name, last name, client id, phone, address, city, state, zip code, notes and rep. Any number of additional custom fields may be entered (this will be covered in another section of this document).
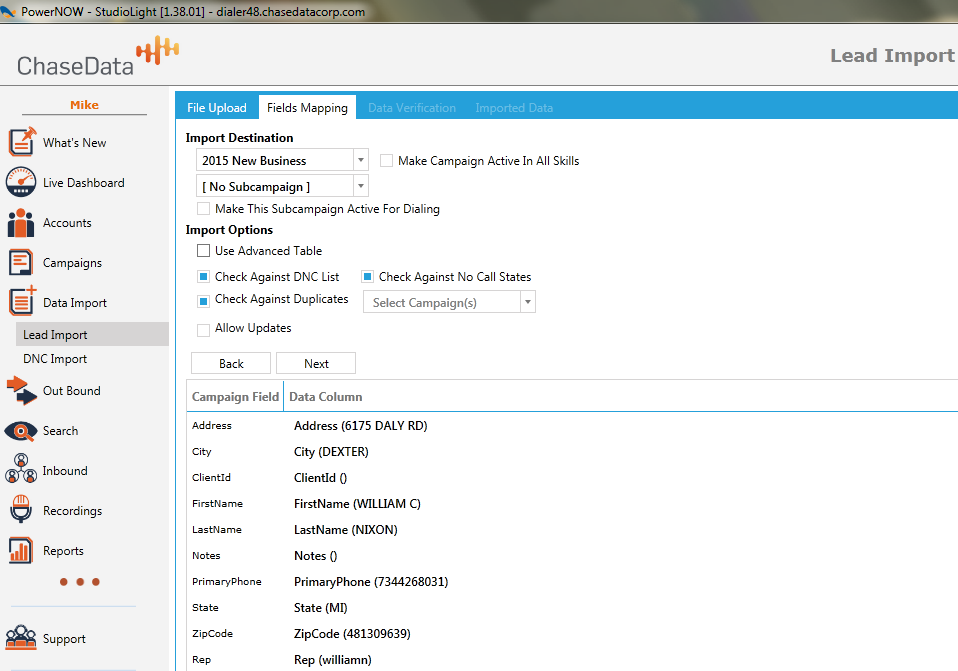
The first step is to choose the campaign into which the leads will be imported. In this case we have chosen the “TEST CAMPAIGN” we created. Next we have the option of importing the leads into a sub campaign. It is not necessary to do so but it can be helpful when in managing the dialing of leads that have been imported into a single campaign at various times.
To create a sub campaign, select “New Subcampaign” (step 2), choose “Custom” (step 3), and then select a name for the sub campaign (step 4). It is often helpful to include the date the data was imported. Finally, map the fields that exist in the system to the data fields in the file that was imported. Notes, rep, attempt and call status should be left at “[select].” Also, not all lists will include complete information. This particular list did not include state and zip code fields, for example. Finally, click next.
By default the import process will exclude duplicates and rows with bad data (e.g. no telephone number). Click next and the import process is complete.
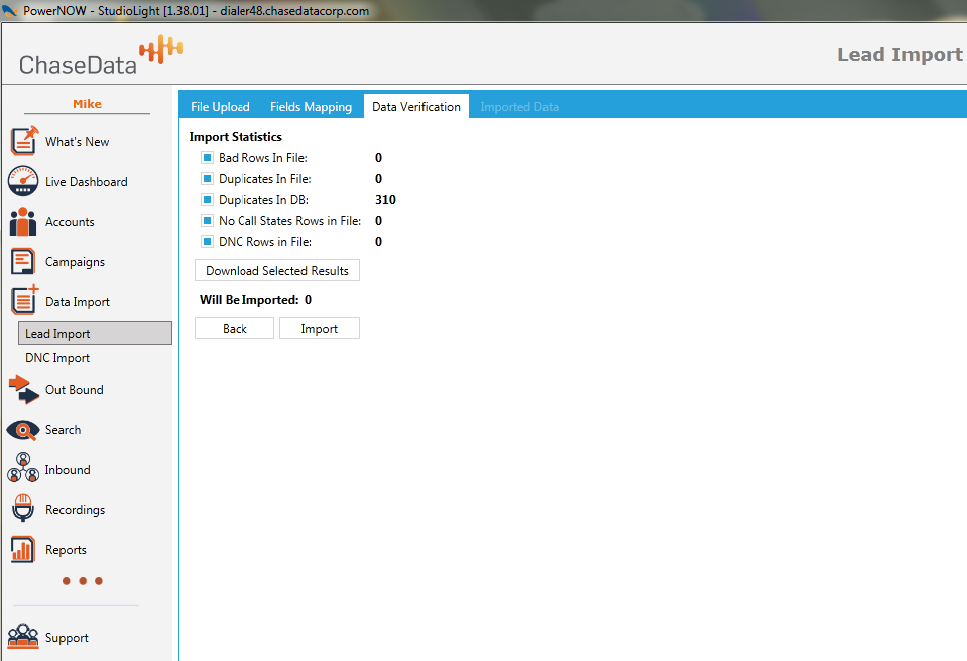
Click Import and the import process is complete.

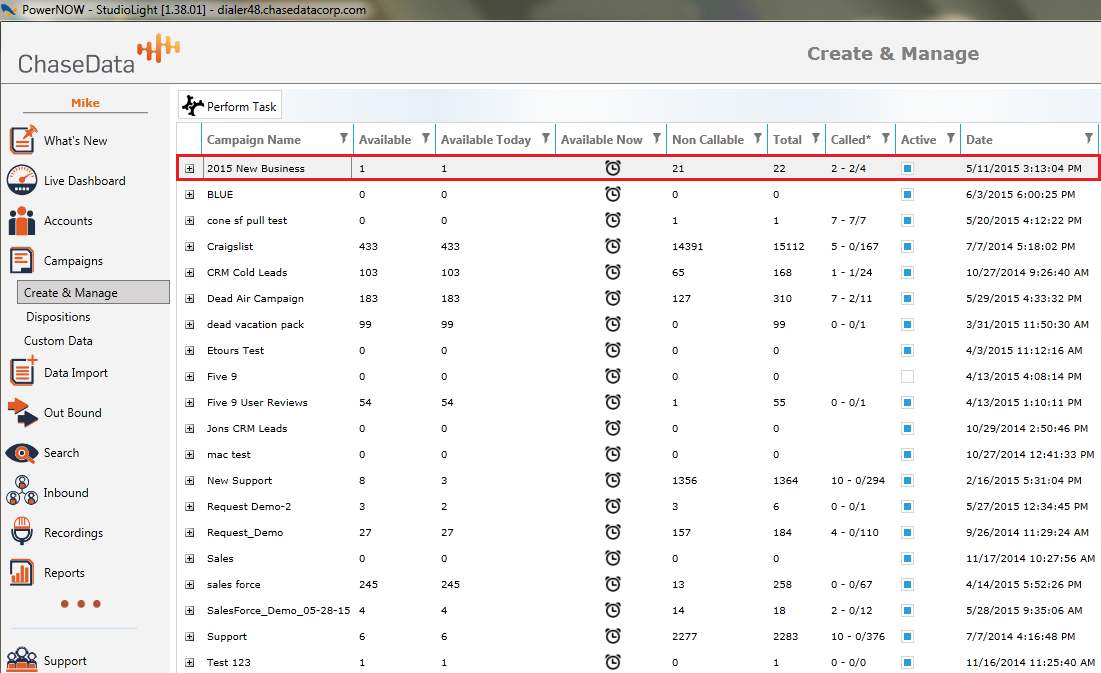
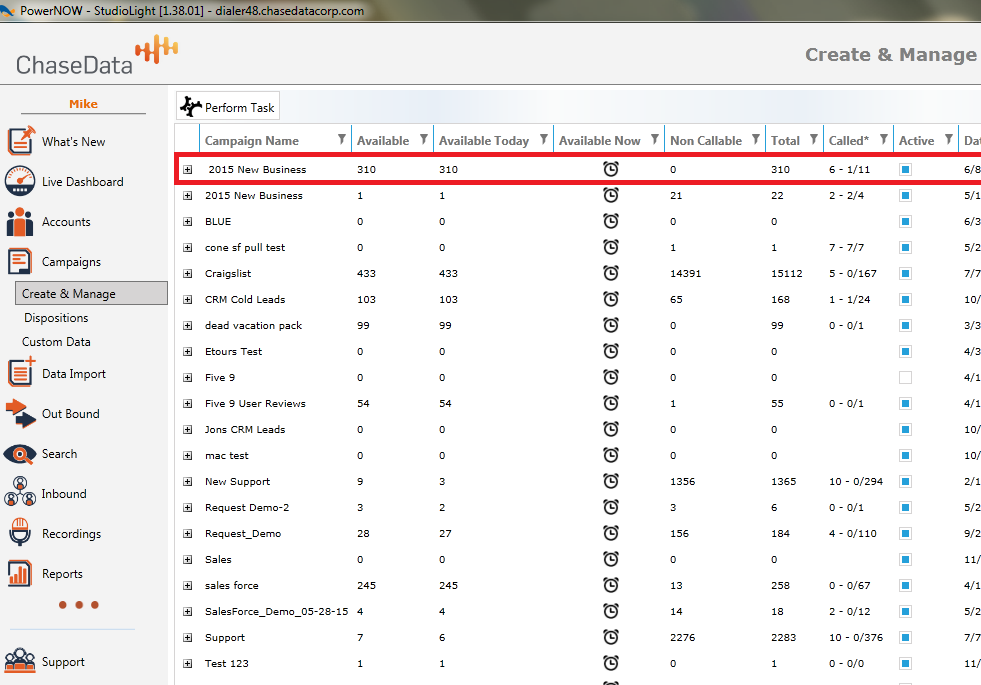
If you return to “Campaign Manager” you will see that the leads are now resident in the campaign.
Related Articles
Setting up a Campaign
Setting up a campaign in ChaseData’s Cloud Contact Center Software is quite simple. The challenging part is knowing you own personal dialing strategy you want to pursue. Whether it be Outbound, Inbound or Blended dialing ChaseData’s campaigns have ...Feature Update-Campaign Settings
Feature Update Campaign Settings & Default Settings The Campaign Settings scope has grown over time, and we have reached a point where we find the need to reorganize/regroup these settings, including some renaming, to make sure it stays intuitive and ...Loading Leads into Campaigns
This article is going to be covering loading leads into a campaign in ChaseData’s Cloud Software Administrator Portal. The first thing you have to do is login to the Administrator Portal and click on Data Import then Lead Import over on the left ...Updating Leads in Campaigns
This article is going explain how to use the ChaseData Cloud Based Software Administrator Portal to update leads you have in your campaigns. Doing this is going to be very similar to importing leads so we will head over to the left menu and choose ...Logging in and choosing a campaign
To log in, first by either running the agent application (blue icon) from your desktop or from within your start menu. It is important to note that you should already have your headset plugged into your PC before you run the Agent application. From ...