Setting up Alternative Number Dialing Rules
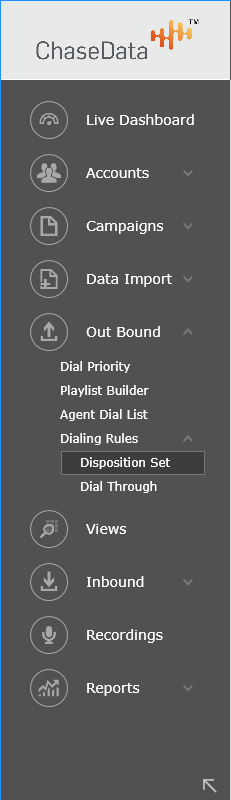
The first place you have to go is the Out Bound dial menu in the Admin Application.
Once here you can select the Dialing Rules menu option.
There are two components to configure alternative numbers.
1. Disposition Set = Wrap Up Codes you see fit to start attempt on alternative numbers.
2. Dial Through = Assigning Alternative Numbers to your attempts in order of how you want them dialed through.
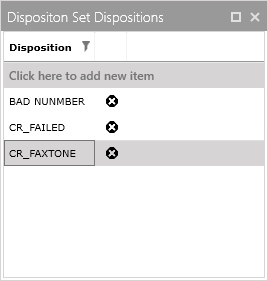
We can start with configuring the Disposition Set first. Here we are going to determine which call statuses or agent wrap up codes deem a contact’s phone number to be swapped for their alternative. All you have to do is click on the grey bar and add a new set. A dispo set is what you assign to your campaigns when they are dialing, this allows them to make use of the entire feature.

After you have made your set you need to click the edit icon and choose which call statuses or agent wrap up codes you want to initiate the swap.
Once you have finished here you are going to go back over to the menu and choose Dial Through.
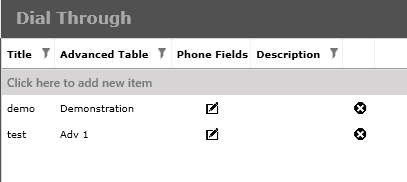
Here is where you are going to assign which custom fields are considered alternative numbers and the order of which they dial through.
Also on this screen you will need to create a dial through configuration. Click on the grey bar and give your config a title. Then you can choose which advanced table in your system is going to contain your additional phone fields. Please reference our article on advanced /custom tables in ChaseData Admin Application. When finished hit enter.

Now you can click on the edit icon and you will be able to choose the following:
1. Your phone number advanced field
2. The disposition set it is going to adhere to.
3. The order in which it dials. ( The higher number is greater priority meaning it dials first. )
Once you have finished the configuration with your Dialing Rules you can jump back over to the Campaign menu. Here you are going to get into the settings for your campaign you wish to dial the alternative numbers on. All that is left to do is choose the Dialing Rules drop down menu and select your Disposition Set from the choices there.
That is going to conclude this article on setting up alternative dialing rules within ChaseData Admin Application.
Related Articles
Setting up a Campaign
Setting up a campaign in ChaseData’s Cloud Contact Center Software is quite simple. The challenging part is knowing you own personal dialing strategy you want to pursue. Whether it be Outbound, Inbound or Blended dialing ChaseData’s campaigns have ...Feature Discussion - Outbound Dialing Summary
Feature Discussion Outbound Dialing Summary In this document we present a snapshot, or a high level summary, of key capabilities of the ChaseData CaaS for making outbound calls. For more detailed descriptions, capabilities, and configuration ...Feature Announcement - Bucket Dialing Mode
Feature Announcement Bucket Dialing Mode We have added additional flexibility to the ChaseData solution to provide the option to allow certain agents to be assigned outbound calls (dial out) from multiple Campaigns at a time. This can be done by ...Setting Up Agent Skills
This article is going to cover creating a new agent skill and configuring it to be used by agents in ChaseData’s Cloud Software Administrator Portal. The first place we need to go is the additional settings menu which is going to be at the top right ...Feature Announcement - Fast Redial
Feature Announcement Fast Redial With the ChaseData Fast Redial feature you can quickly and automatically call again (redial) numbers that meet certain criteria, for example, -calls that returned a busy signal or went to an answering machine. ...